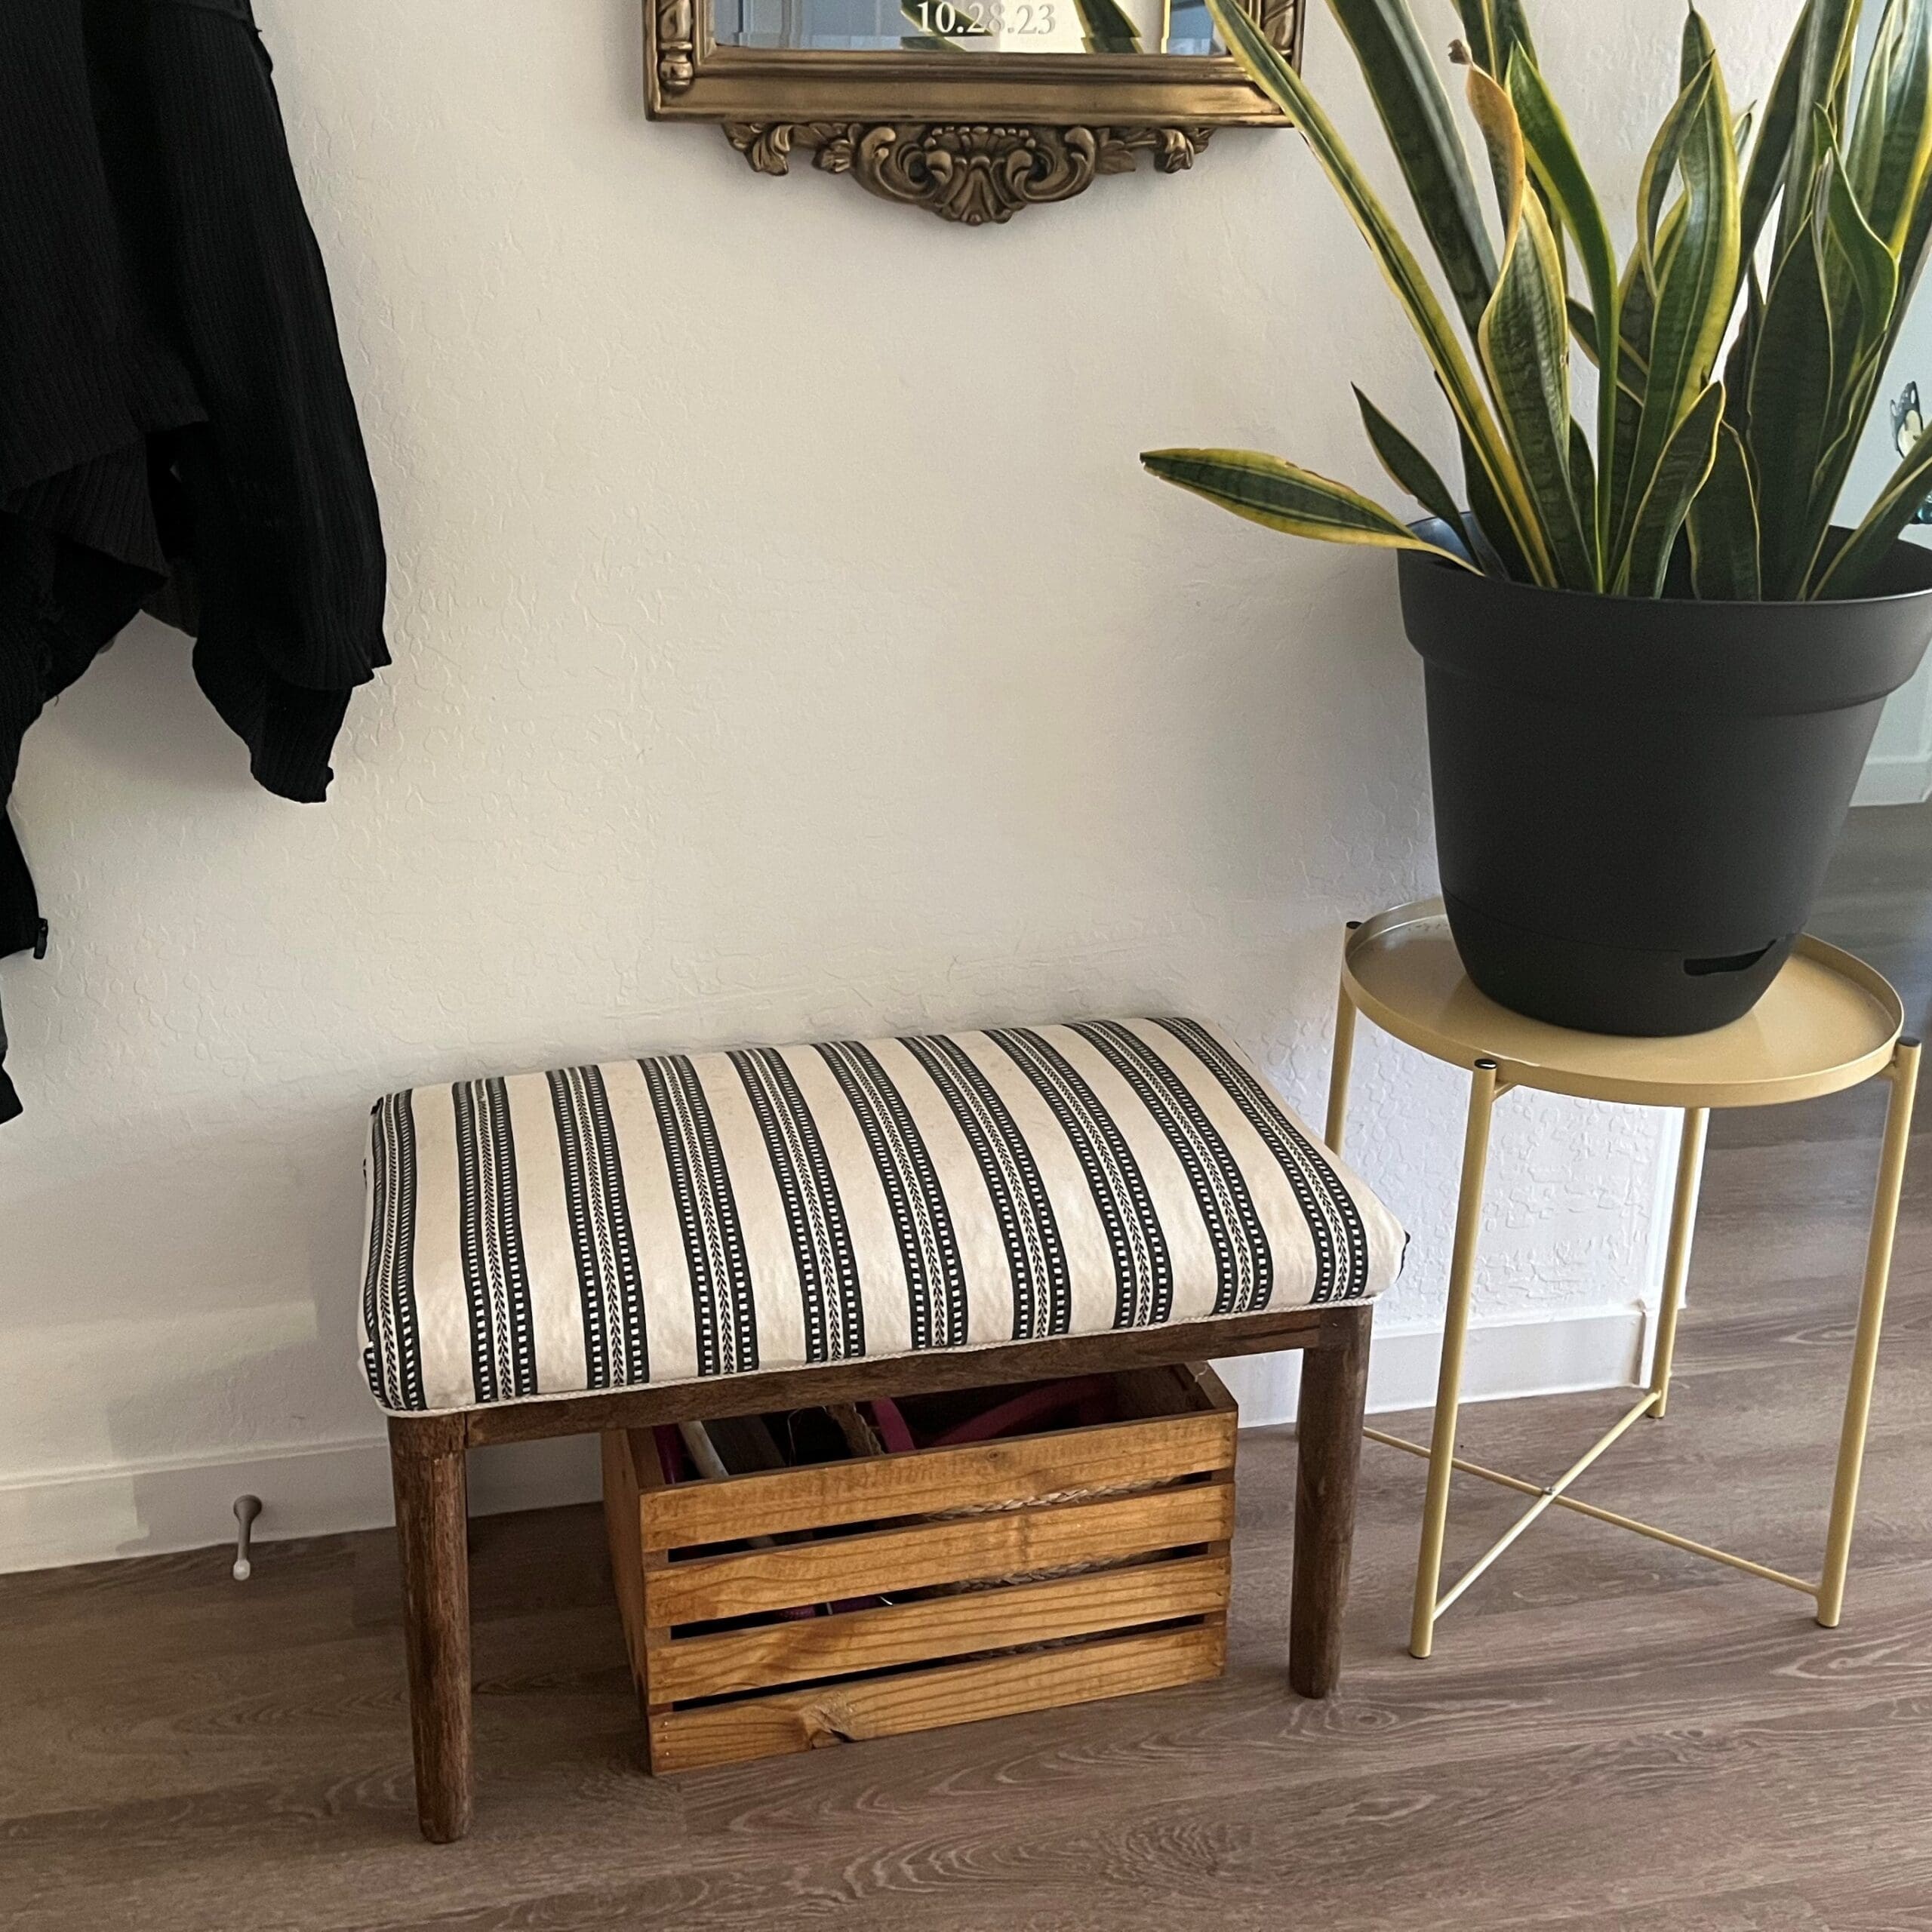
With a little creativity and some elbow grease, you can breathe new life into an old piece of furniture while reducing waste and adding personal flair to your home decor. In this tutorial, we’ll guide you through revamping your entry bench by redoing the cushioned top and sanding down the legs and base for a fresh look. Plus, you can apply most of these techniques to any wood furniture you have. Let’s get started!
Items Needed:
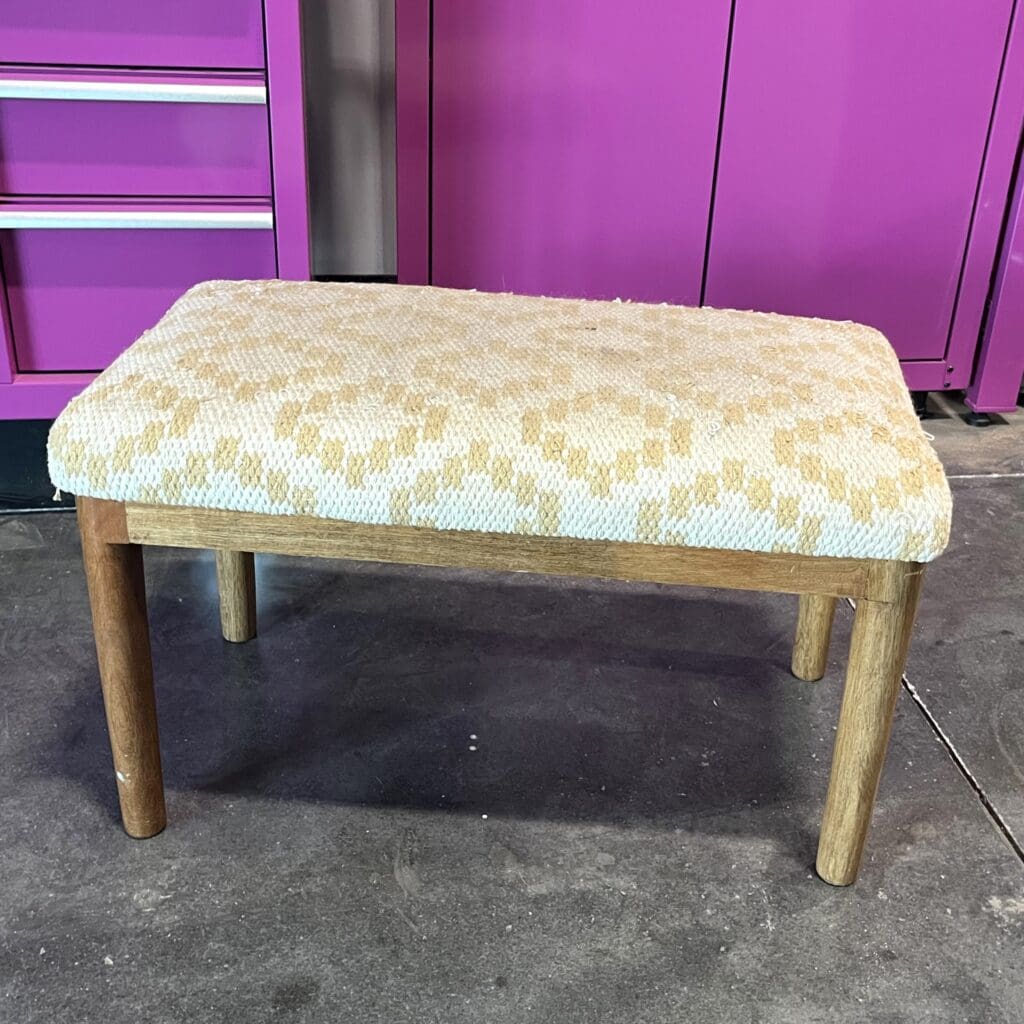
- Cushioned bench
- Upholstery fabric of your choice
- Glue Gun
- Sander
- Sandpaper (medium and fine grit)
- Paint or wood stain (optional)
- Top coat
- Paintbrush, foam roller, or old rag
- Screwdriver
- Measuring tape
- Scissors
- Safety glasses
- Dust mask
Optional – These items may be needed depending on your specific bench:
- Brad nailer / stapler (optional depending on type of bench)
- Staples (optional)
- Drill
- Wood filler (if needed)
- Foam cushion (if replacing)

Please note, depending on the type of furniture you are refinishing, you may need to reorder or tweak some of these steps.
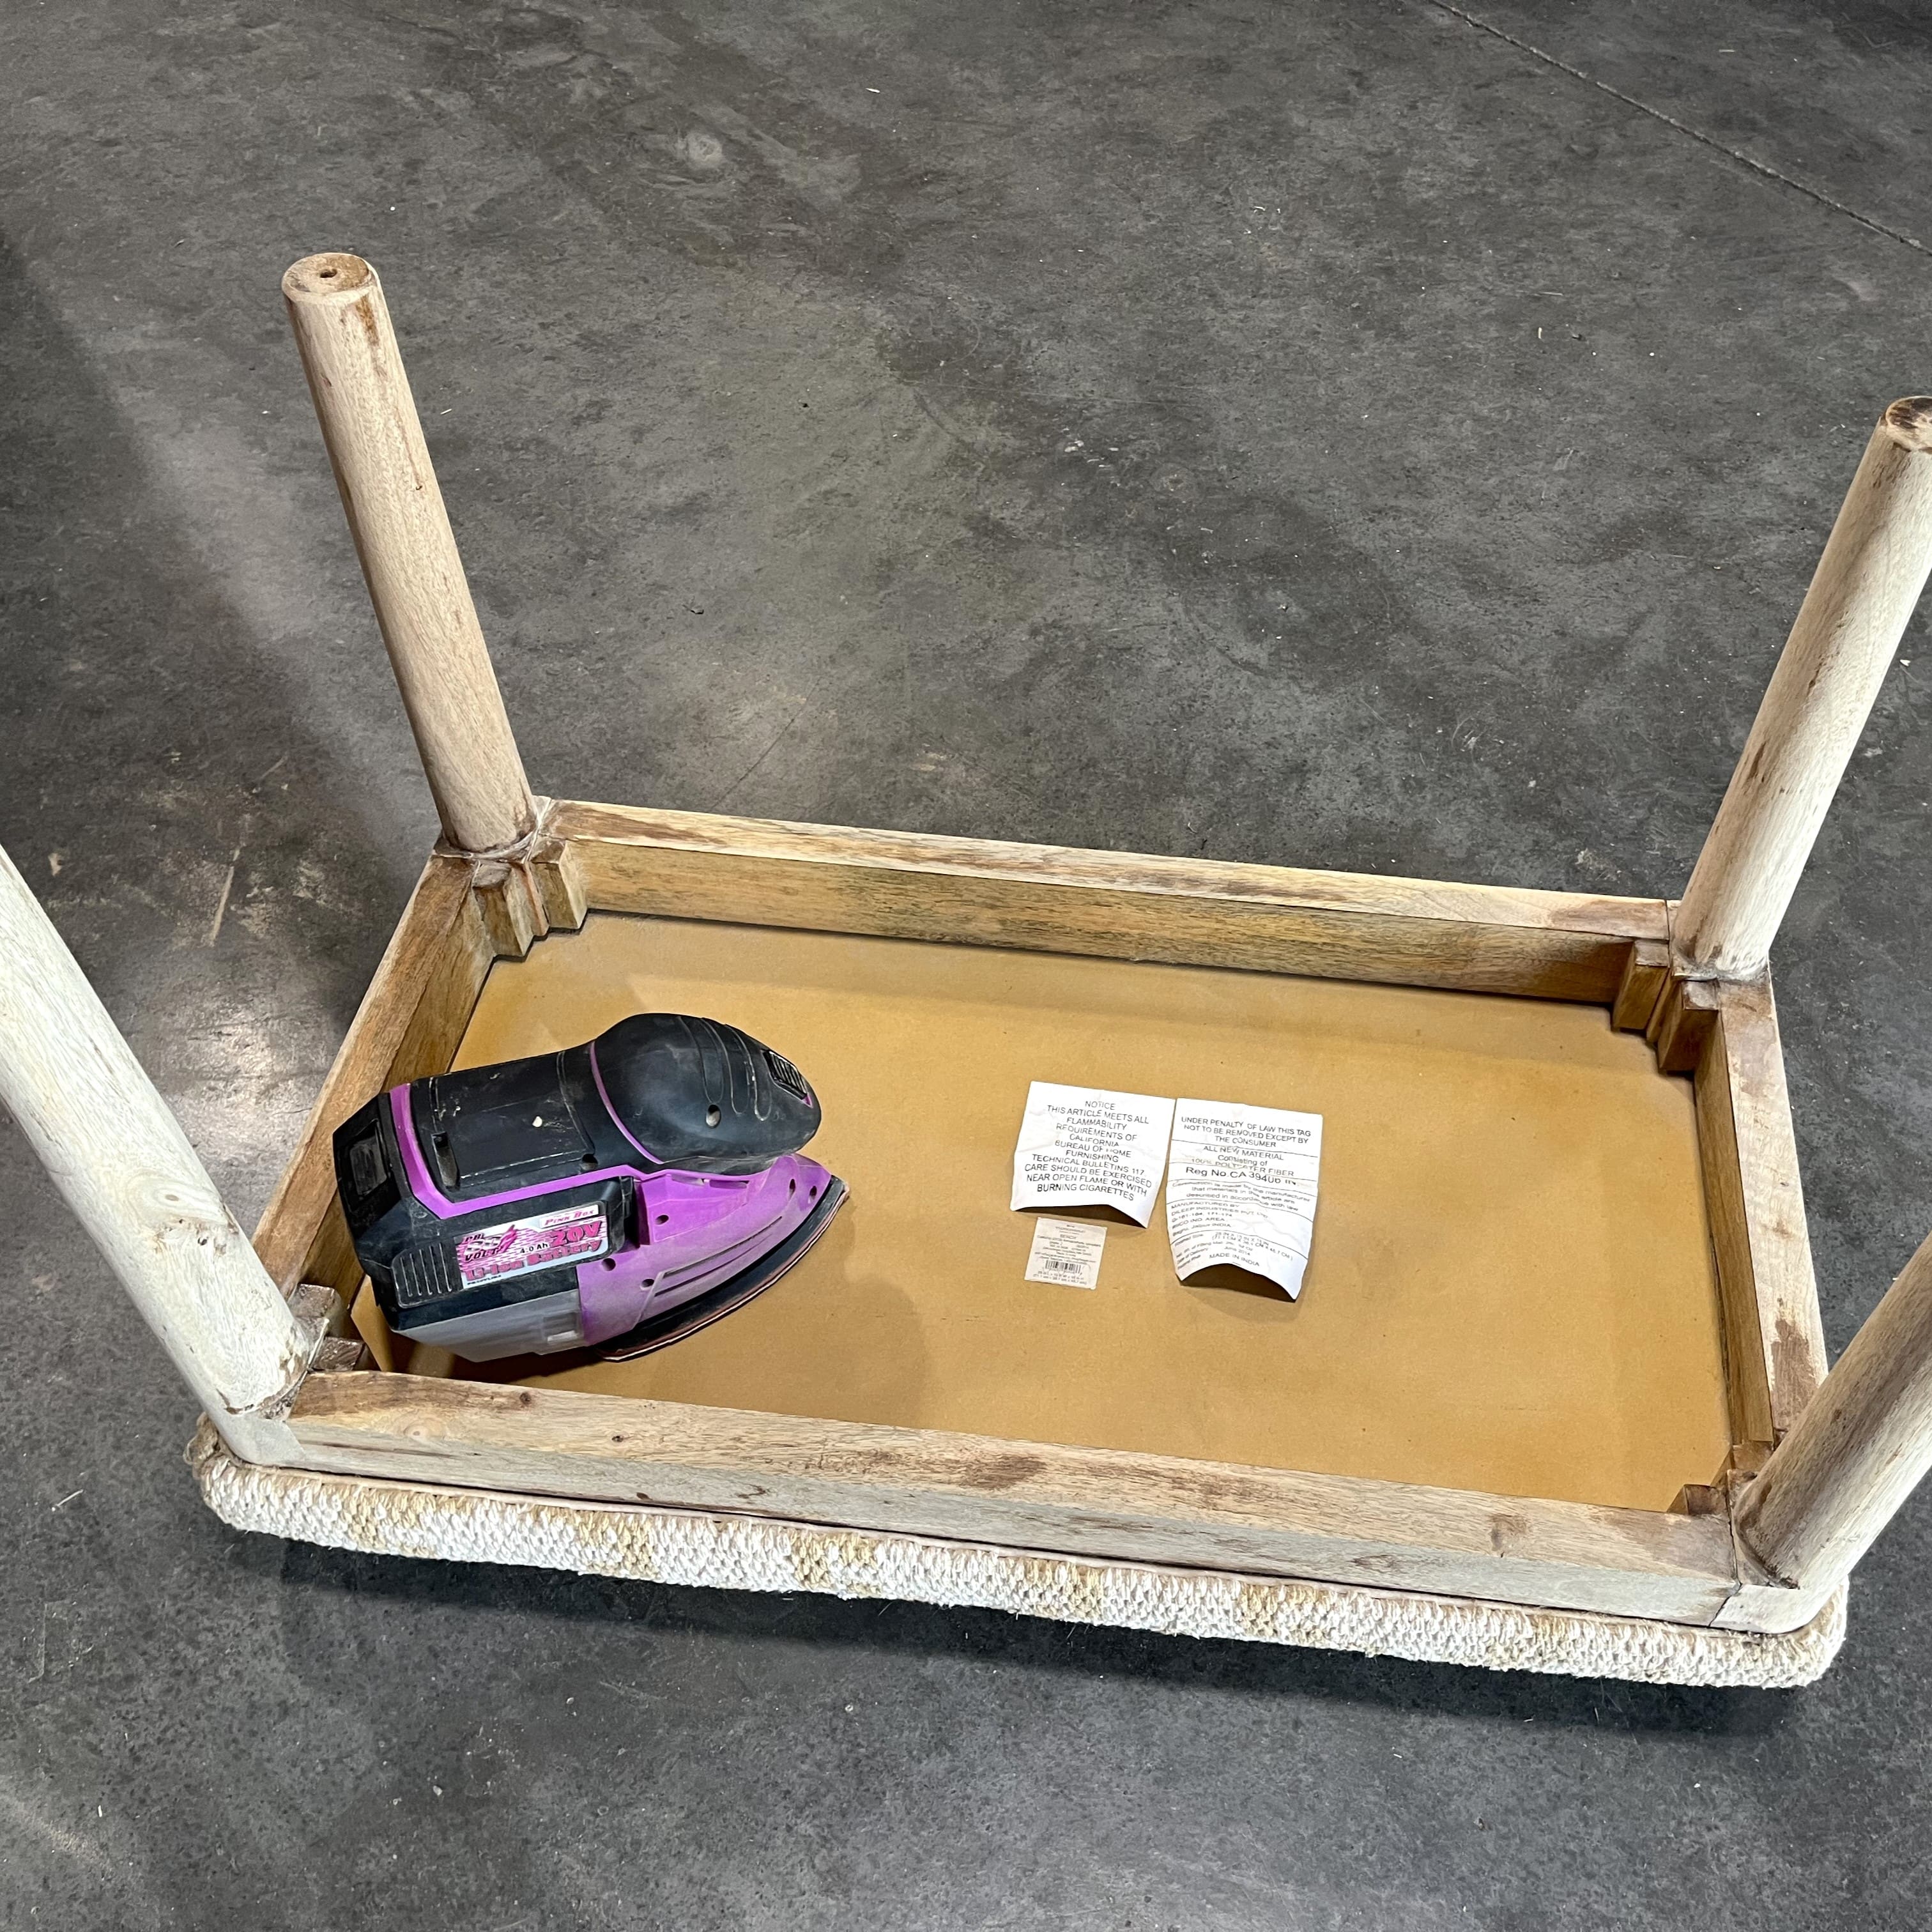
One: Sanding the Legs and Base
- Put on your safety goggles and dust mask to protect yourself from dust particles.
- Use medium-grit sandpaper to sand down the legs and base of the bench, removing any existing finish or rough spots. Pay attention to detail, ensuring a smooth surface.
- Once you’ve achieved a smooth surface, transition to fine-grit sandpaper to create a silky finish.
- *Note: before you sand, if you’re able to, it would be ideal to disassemble. Sadly the cushion on ours was unable to be detached.
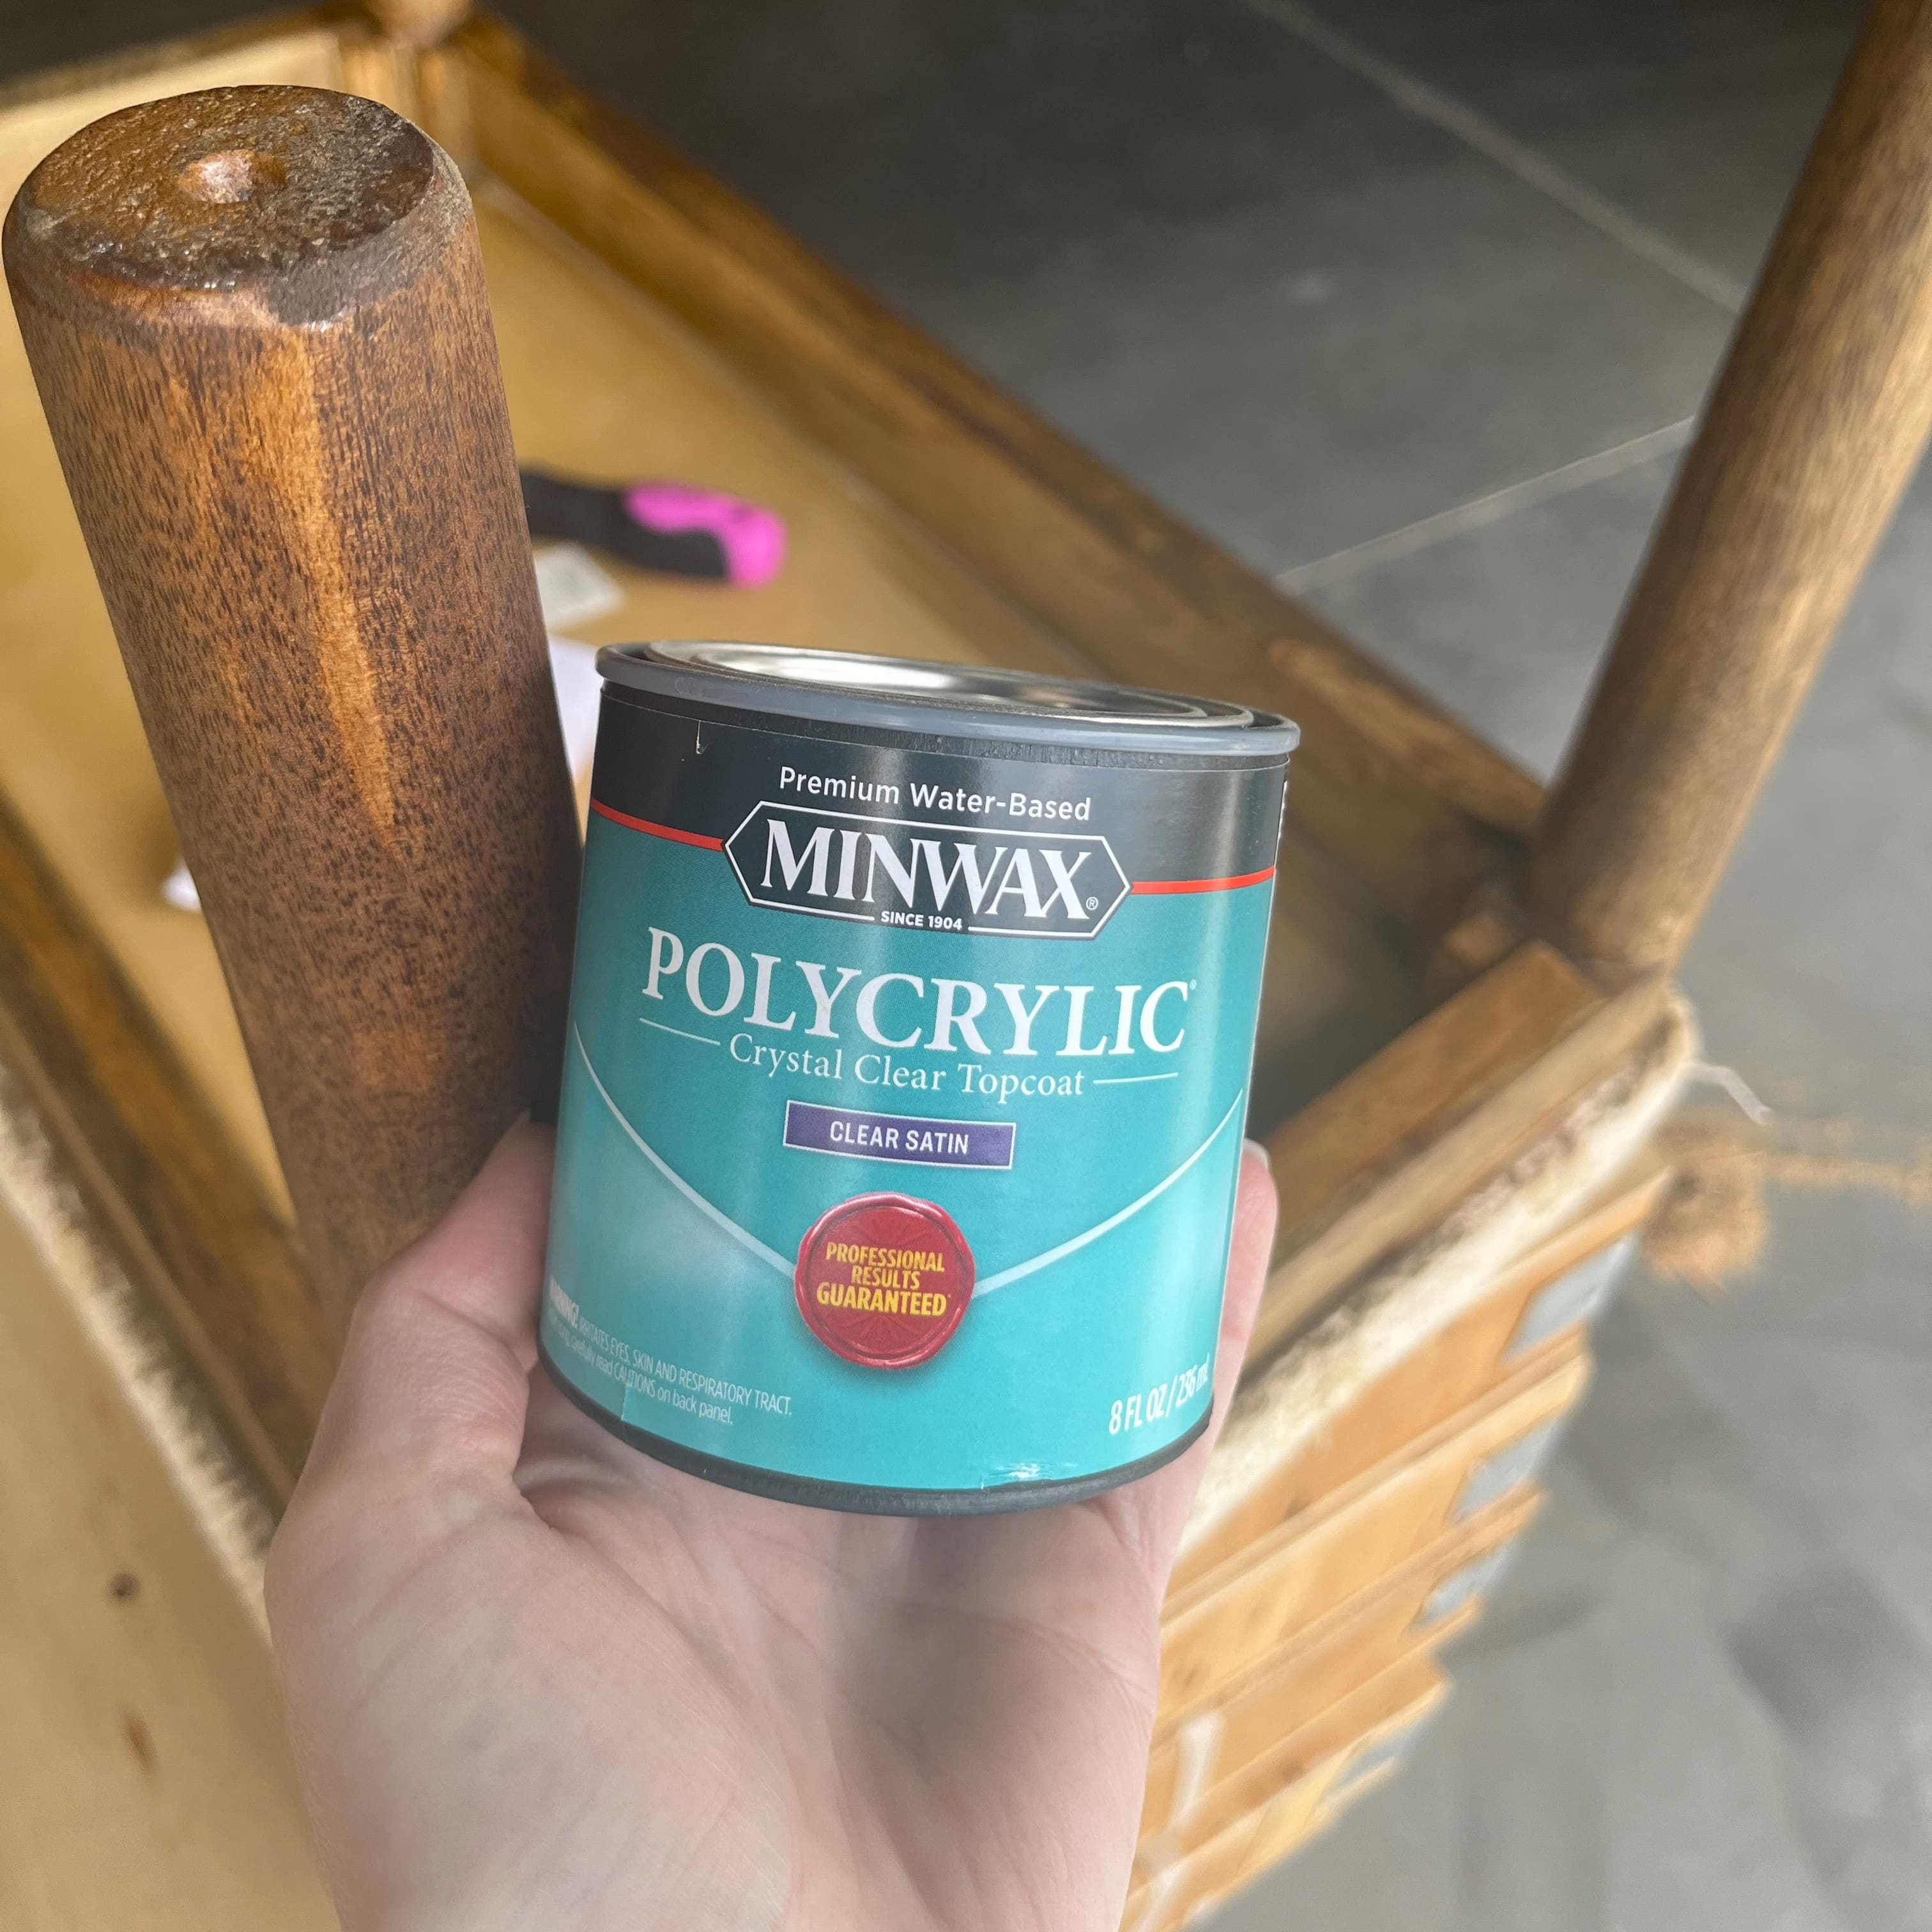
Two: Staining the Wood
- Now that you’ve spent way longer than planned sanding, it’s time for a fresh coat of paint or wood stain to the bench legs and base to match your decor style.
- Allow the paint or stain to dry completely first before adding a sealant.
- We used Minwax brand in the shade Dark Walnut.

Three: Sealing the Color
- Just when you think you’re done, you’re not. You need to protect your hard work by coating the entire surface with a top coat.
- Follow manufacturer instruction when using a sealant.
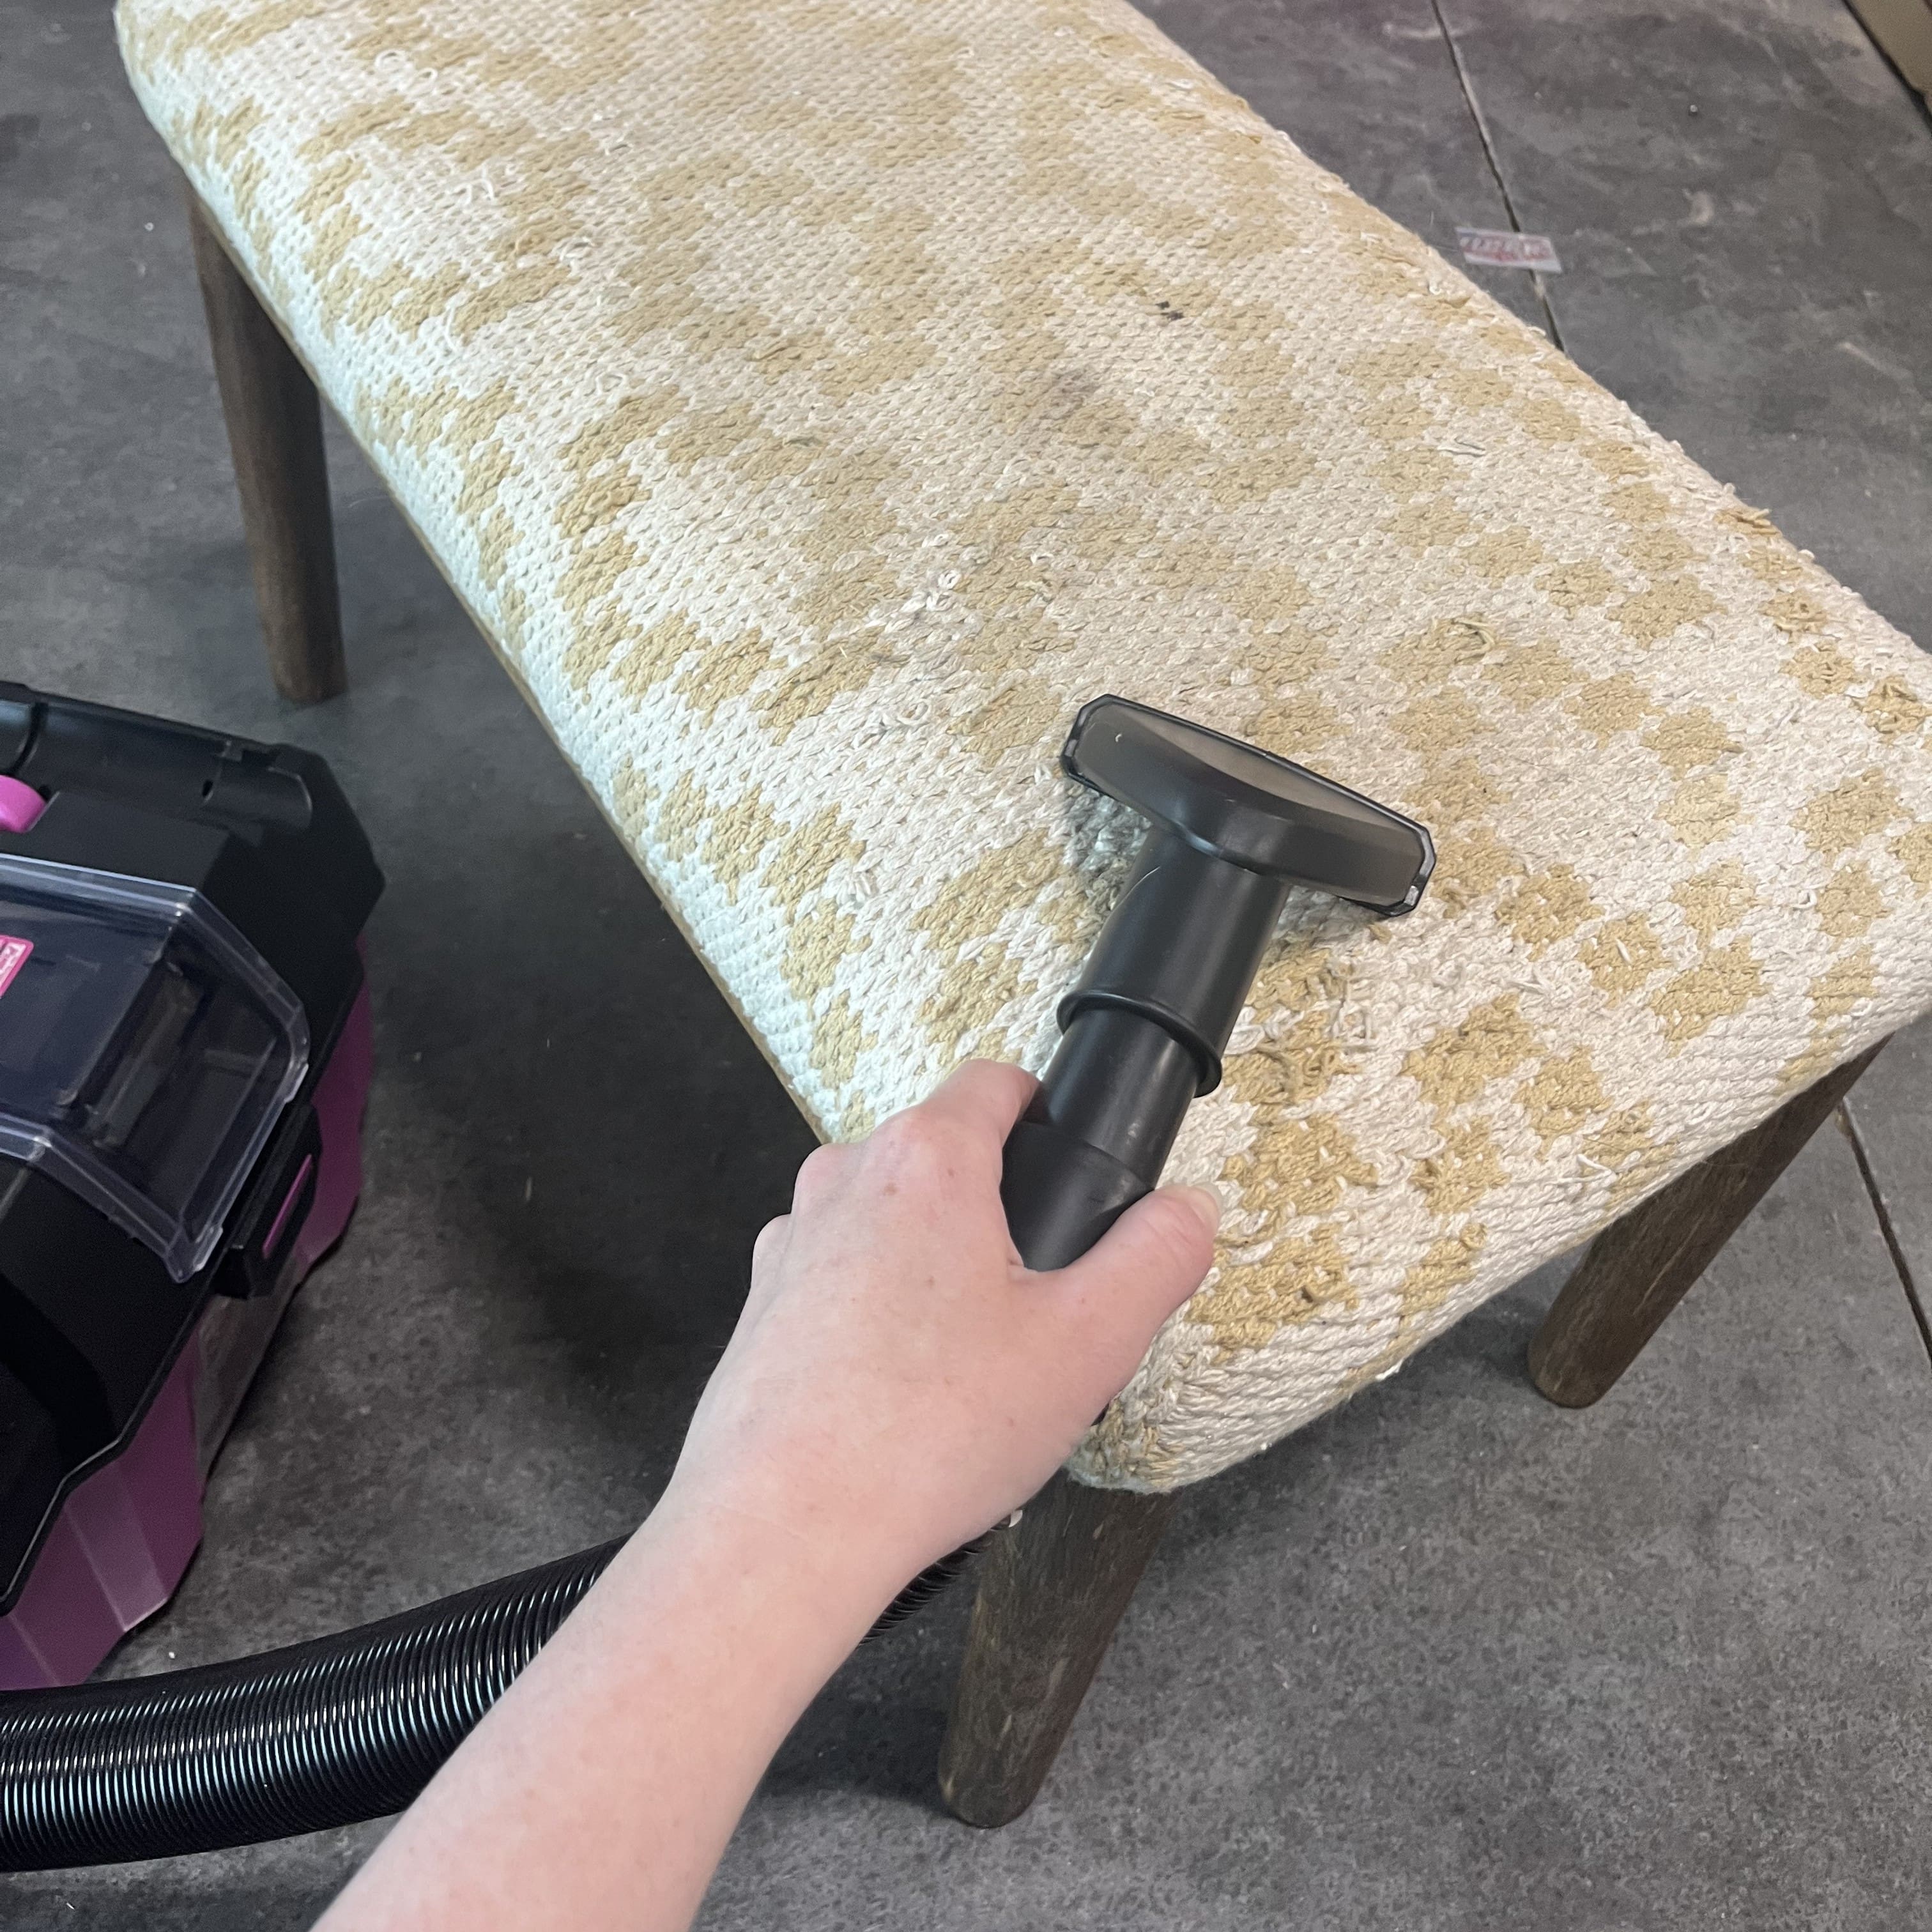
Four: Vacuum the Cushion
- Vacuum the cushion to remove any saw dust, dirt, and debris.
- Note: You can skip this step if you were able to separate the seat from the legs or if you’re able to remove the old fabric.
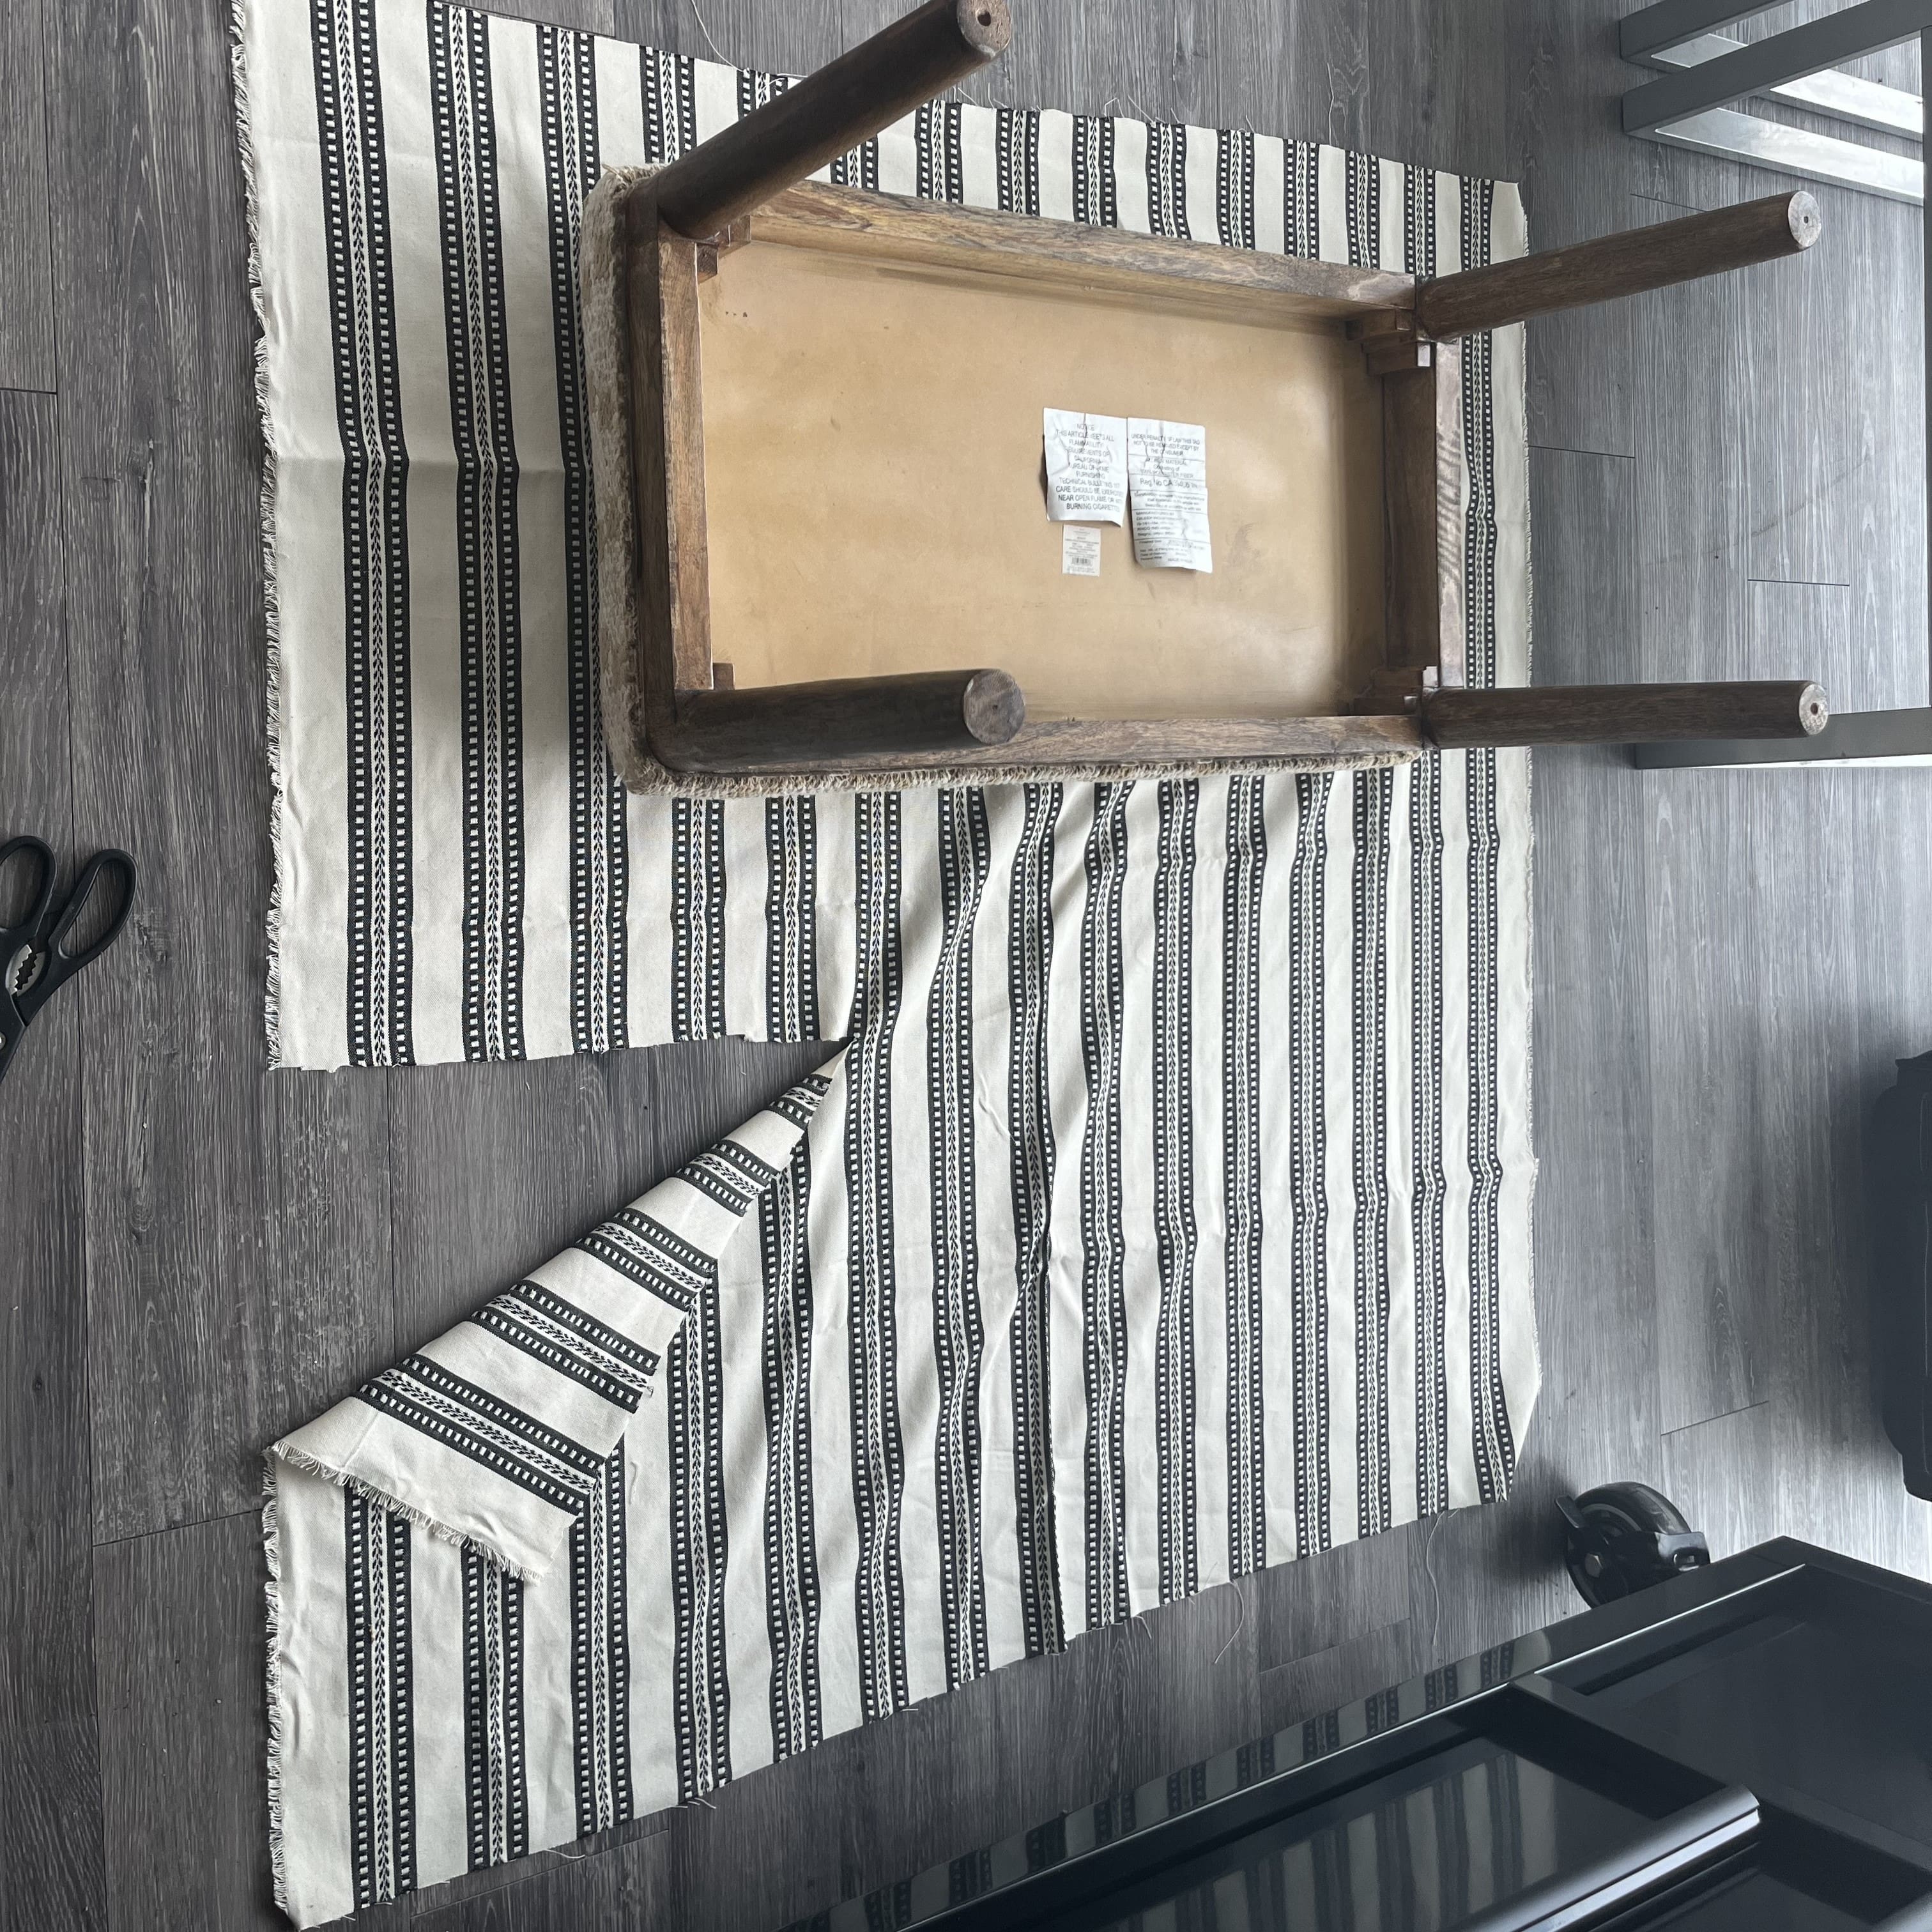
Five: Measure the Fabric Top
- Measure the dimensions of the cushioned top to determine the amount of upholstery fabric needed.
- If the existing cushion is worn or damaged, remove it carefully and replace it with a new foam cushion of the same size.
- First, lay the upholstery fabric flat on a clean surface; then, place the foam cushion on
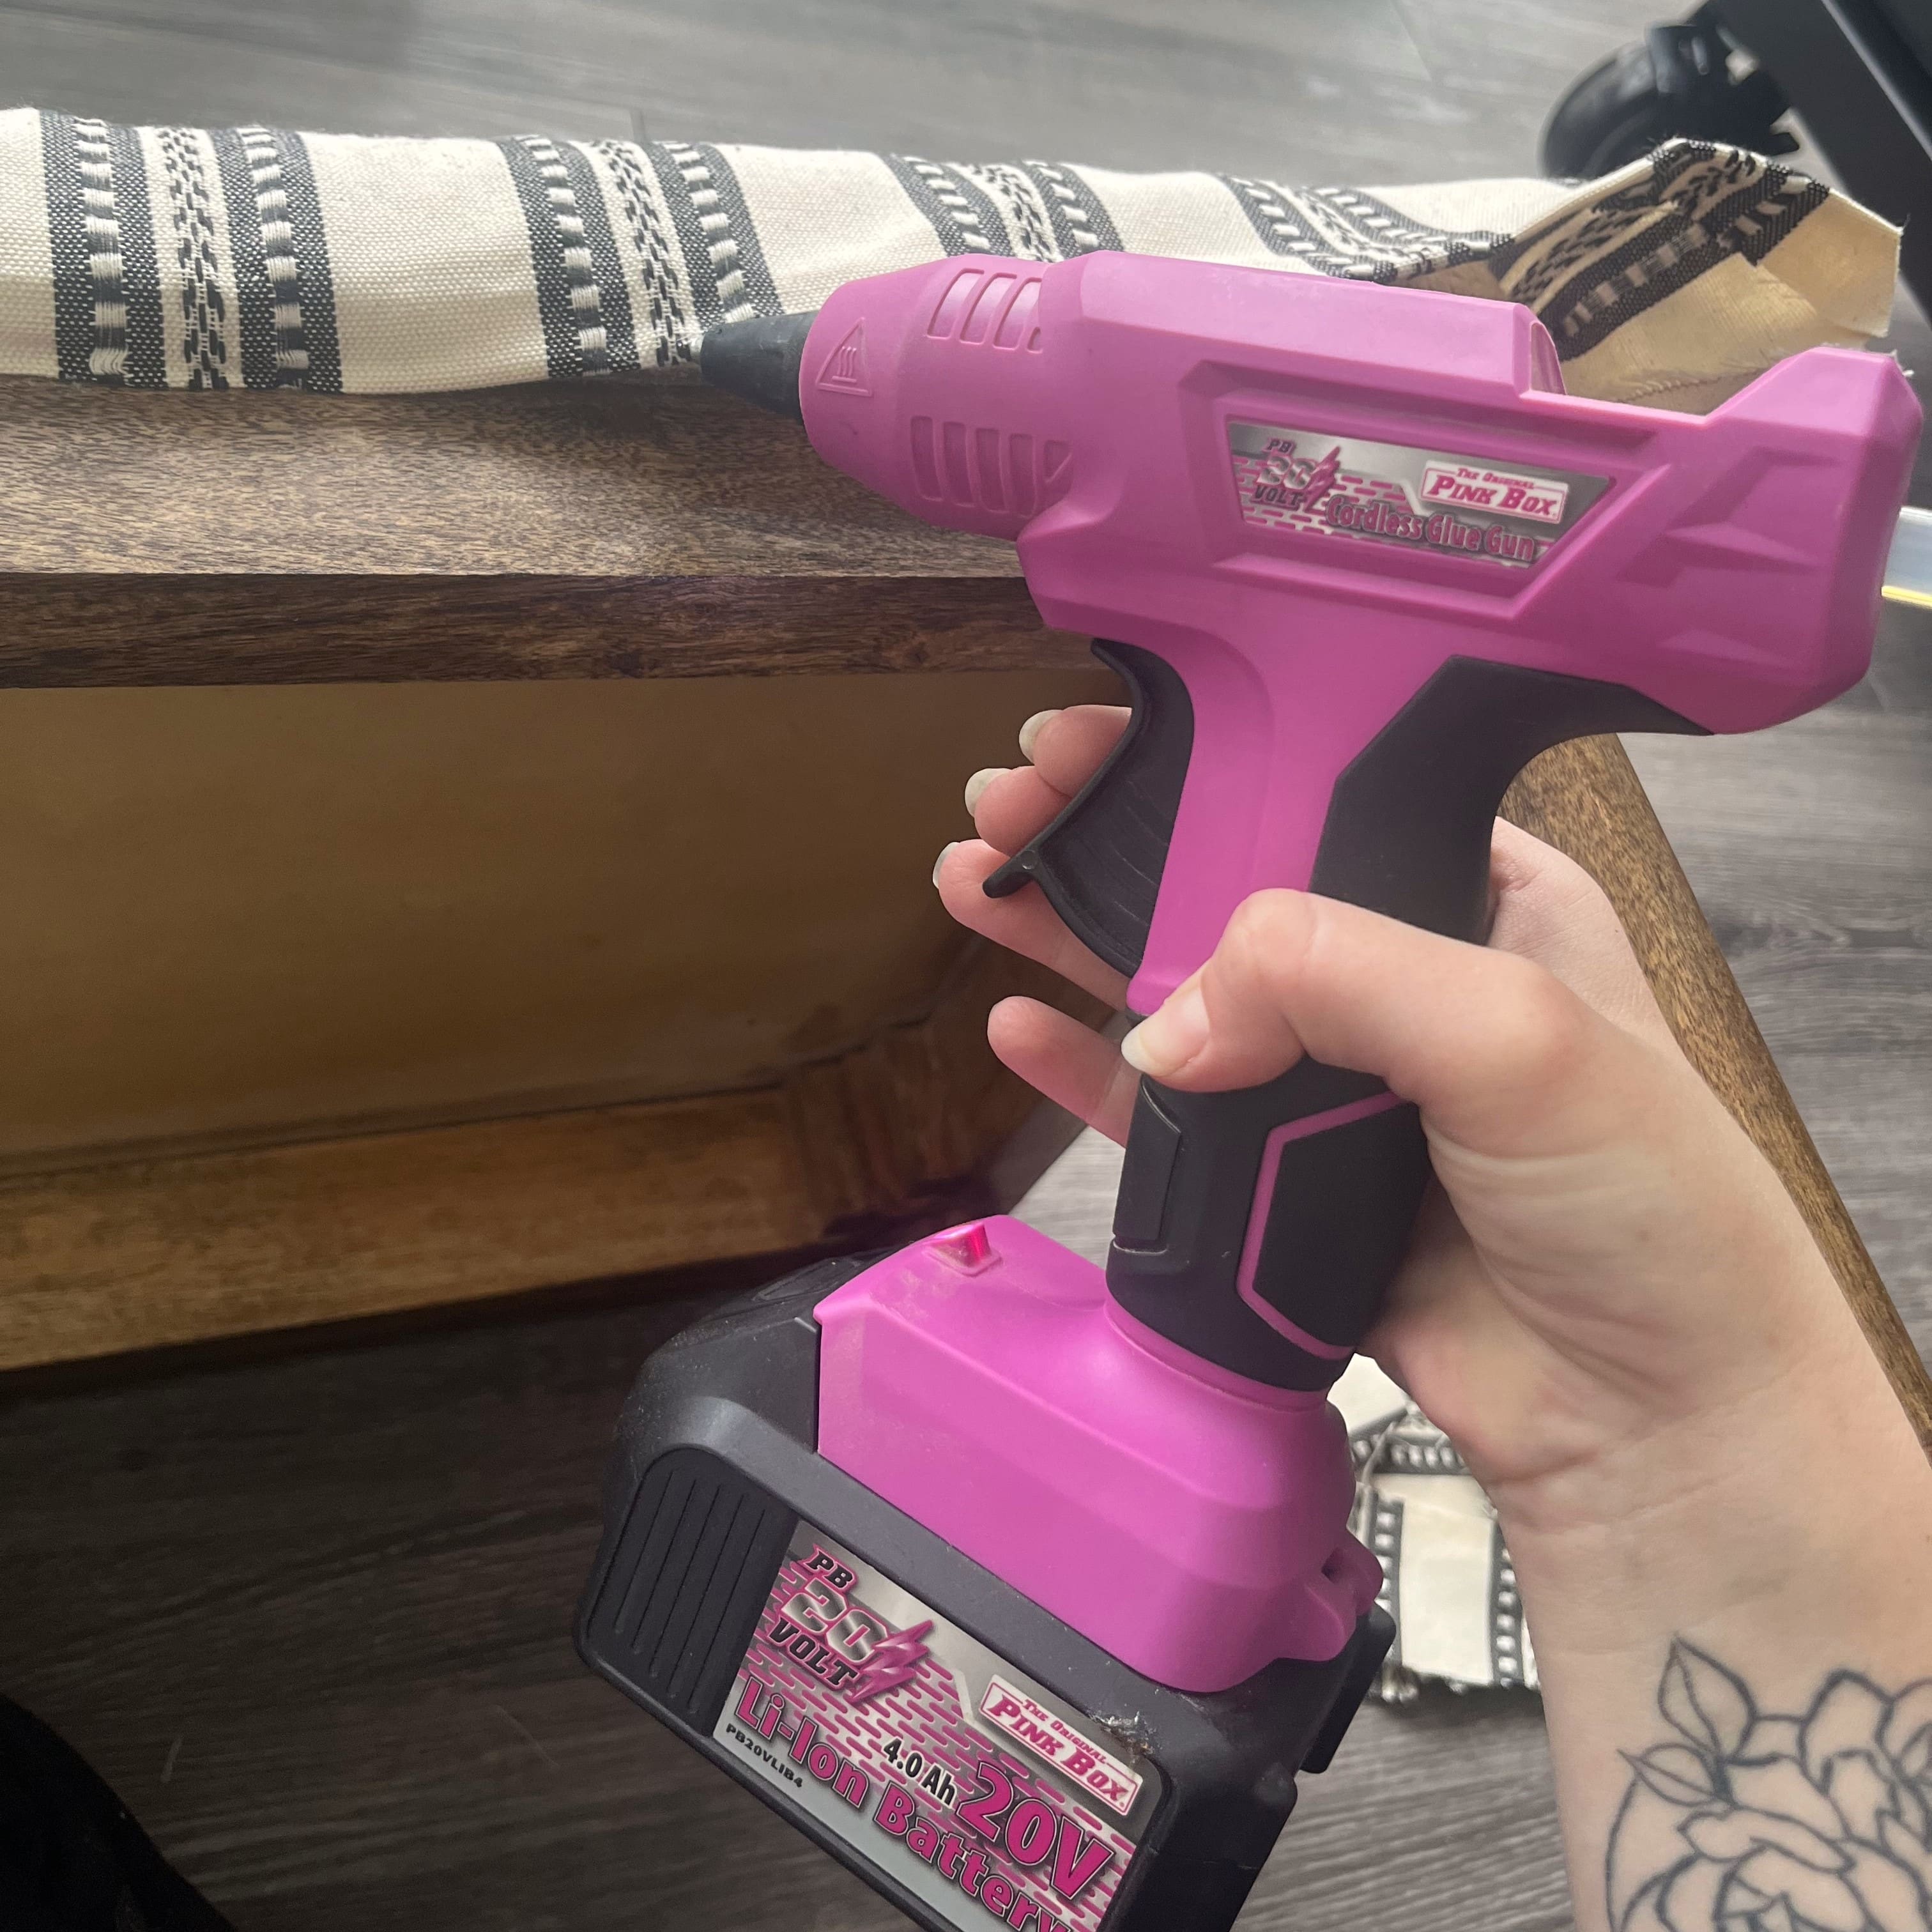
Six: Gluing the Fabric Top
- Pull the fabric taut over the cushion, folding and stapling or gluing it securely to the underside of the cushioned top. Start with the center of each side and work your way outwards, ensuring even tension.
- Trim any excess fabric with scissors for a neat finish.
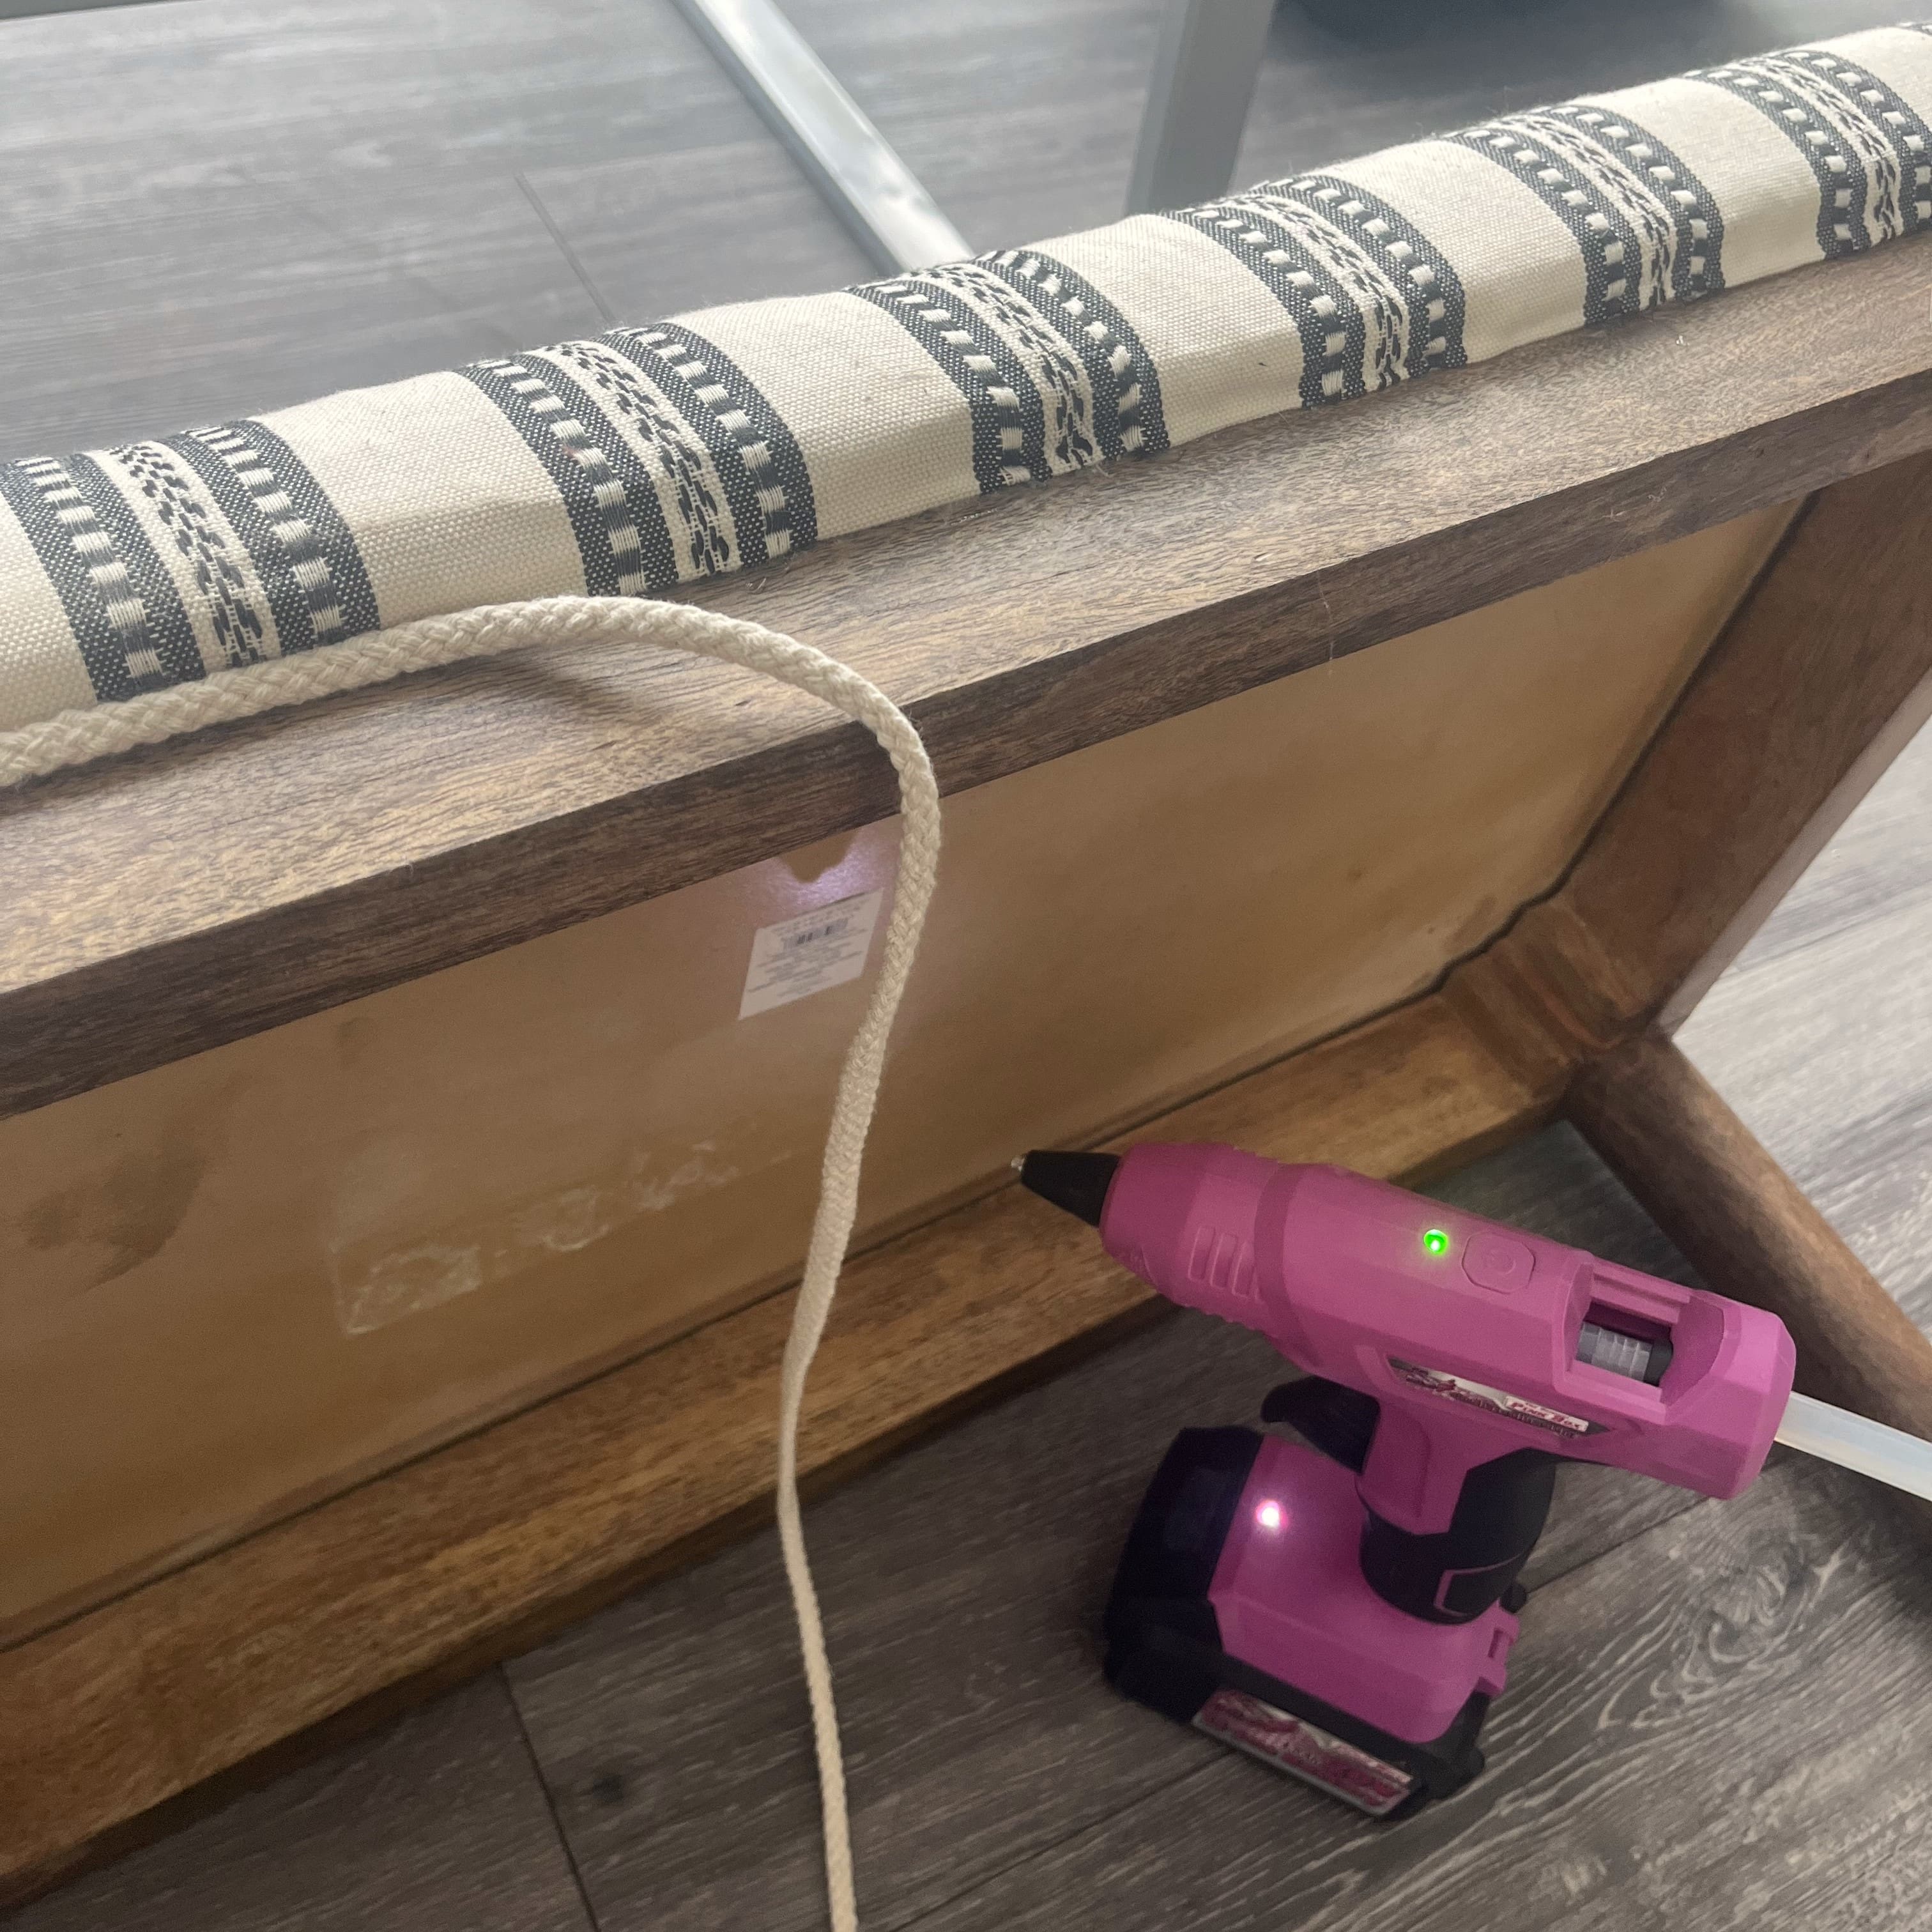
Seven: Add Decorative Trim
- This step is optional, but really elevates the overall look and can help hide any imperfections.
- Measure the perimeter of the bench and cut to length.
- Use hot glue to line the edge with a trim of your choice.
Eight: Appreciate Your Handiwork
- Now that you’ve finished, take a step back and admire your craftsmanship.
- Know that you do not have to be a professional to use power tools; you just need a “can-do” attitude and you can accomplish anything.